
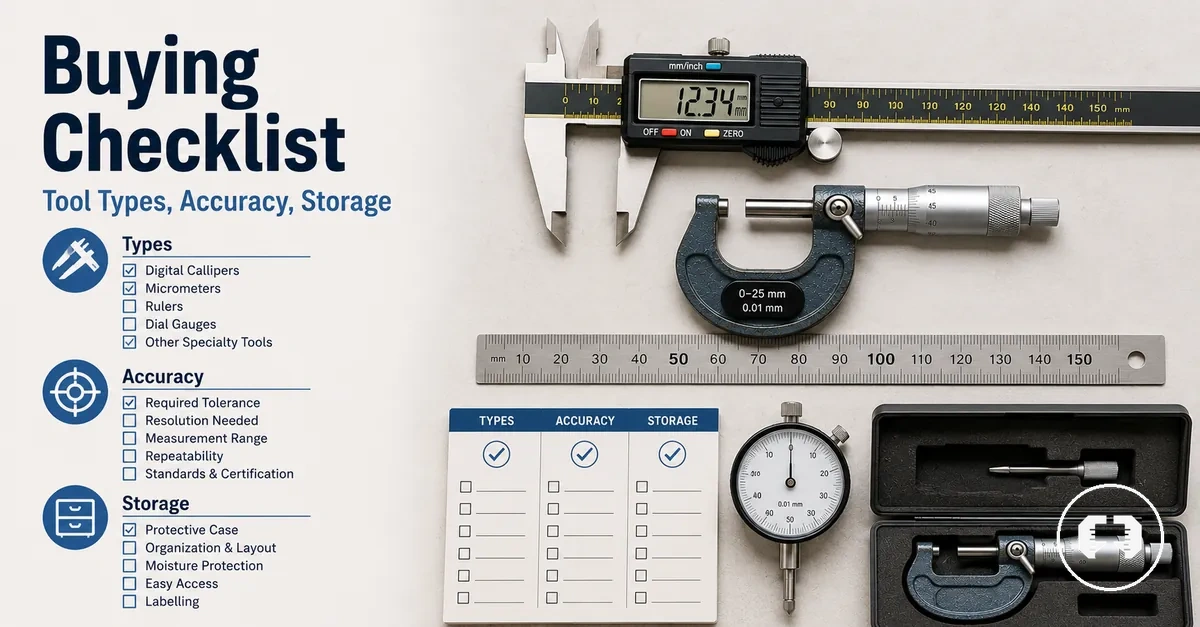
Precision measuring tools buying checklist for kit selection
A precision measuring tools buying checklist helps verify tool fit, measurement requirements, kit completeness, storage needs, and price comparison readiness before offers are compared. This buying checklist supports purchase-preparation, not a product ranking.
A buying checklist for precision measuring tools is a pre-purchase check that organizes kit selection around accuracy, range, tolerance, tool mix, handling reliability, accessories, and storage. Precision measuring tools should be evaluated by the work they must measure, not by brand claims or product-list appearance. For broader category context, the precision measuring tools hub separates decision support from merchant or SKU selection.
When a measuring kit is being chosen for workshop, hobby, repair, or precision-fit work, suitability depends on the measurement jobs, part size, material, tolerance, working environment, and user skill. A precision tool set may be ready for price comparison only after the required range, accuracy burden, tool mix, and storage conditions are clear. The next purchase check starts with the measurement jobs the kit must cover.
Measurement jobs the kit must cover
Measurement jobs determine which tool functions belong in a kit before features or prices are evaluated. The workpiece, required access, expected range, and measurement type shape the selection, so the workpiece and measurement type decide the kit.
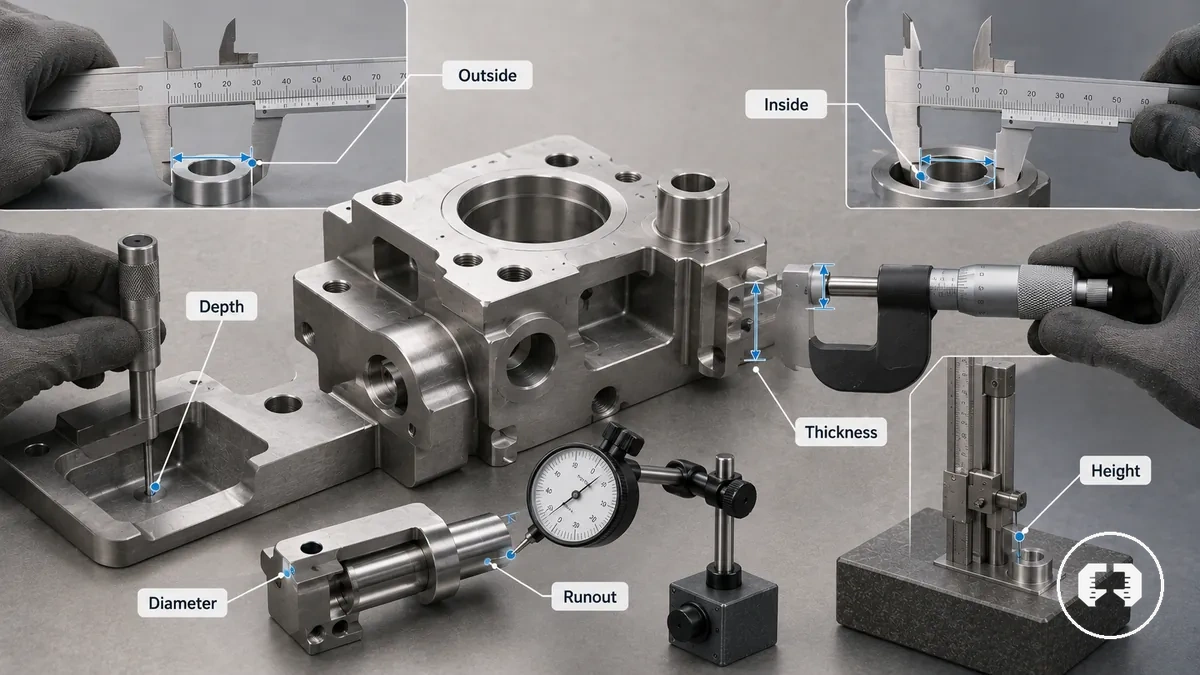
Measurement jobs the kit must cover can be verified with the checklist below before individual tool features are considered.
- Outside measurement → requires a tool function that reaches external surfaces across the required range.
- Inside measurement → requires a tool function that provides access to internal dimensions.
- Depth → requires a depth function for recessed features and limited access.
- Step measurement → requires a tool function that compares two surface levels.
- Thickness → requires consistent contact across the measured section.
- Diameter → requires a tool function suited to the part shape and measurement range.
- Runout and height → require indicator or gauge functions when repeat checks and reference alignment are needed.
When inspection jobs change from hobby work to precision-fit tasks, the required tool mix may also change because part size, tolerance, range, and access conditions differ. Selection should reflect the measurement needs rather than assuming every function is necessary. Related criteria are covered in task and material fit.
If a kit does not cover the required measurement jobs, identify the missing tool function before expanding the kit. This keeps the purchase decision focused on real workpiece checks before moving to how to choose precision measuring tools.
Accuracy, resolution, range, and tolerance requirements
Accuracy, resolution, range, and tolerance requirements determine whether a measuring kit can support the intended work before price comparison begins. The right selection depends on matching tool accuracy with the required tolerance, because the intended tolerance defines the level of verification needed.
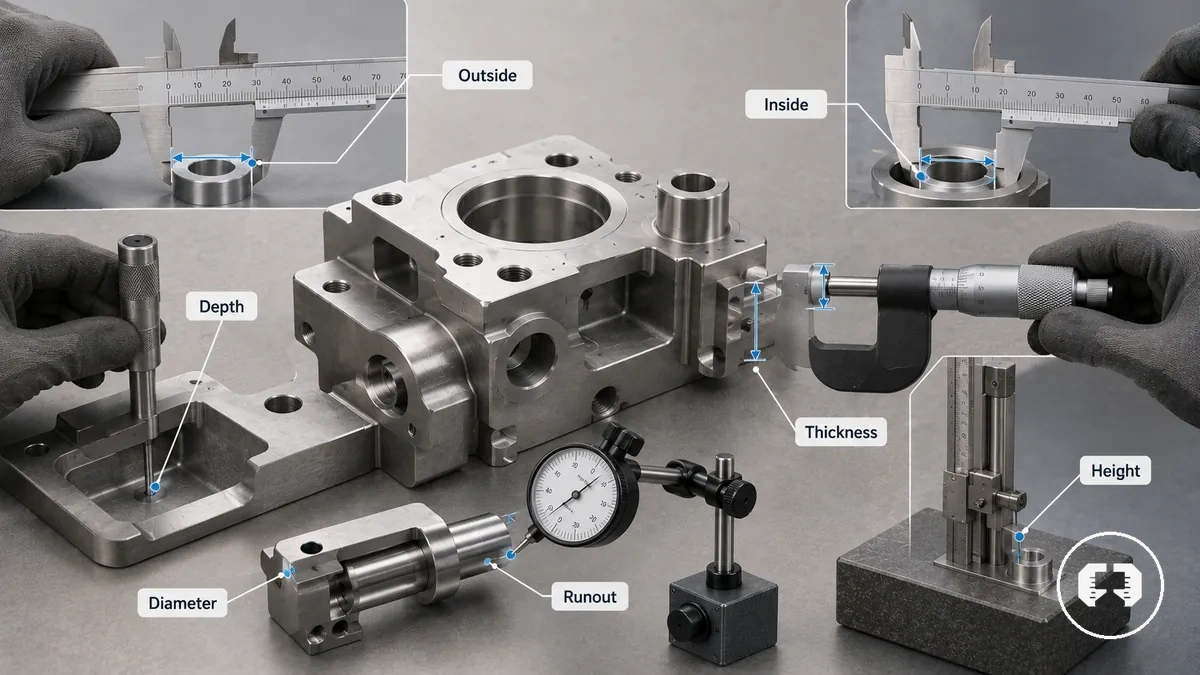
Accuracy, resolution, range, and tolerance requirements organize purchase readiness by separating measurement attributes that influence selection risk. Tool accuracy describes how closely a measurement can represent the intended value, while resolution describes the smallest readable increment on a display or scale. A finer readable increment can improve readability, but it should not be treated as proof of dependable measurement because accuracy differs from display resolution.
| Tool attribute | Value or condition | What to verify | Selection risk |
|---|---|---|---|
| Accuracy | Matches tolerance requirement | Tool accuracy | Unsuitable verification |
| Resolution | Readable increment | Display increment and measurement uncertainty | Readable but not dependable measurement |
| Range | Fits workpiece size | Measuring range and access | Incomplete coverage |
| Tolerance fit | Tolerance band | Verification requirement | Wrong selection |
| Repeatability | Consistent readings | Repeat checks | Variable results |
When tolerance requirements become narrower, a measuring kit may need stronger verification of tool type, repeatability, and measuring range before it is considered suitable. Loose tolerances may allow simpler tools, while narrow tolerance margins usually increase the importance of verification. Compare the required range and repeatability before making a selection.
A readable display increment is often mistaken for proof of higher measurement quality, but dependable measurement also depends on tool accuracy, repeatability, and measurement uncertainty. Understanding this distinction helps evaluate accuracy and cost-value tradeoffs without assuming that a higher-priced tool is automatically the better choice.
Tolerance fit and the 1-to-10 selection rule
Tolerance fit and the 1-to-10 rule help screen whether tool accuracy is likely to suit the intended tolerance before a measuring tool is selected. The rule compares acceptable uncertainty with the available tolerance margin to identify when a tool may be too coarse for the work. It is a screening aid, not a universal standard.
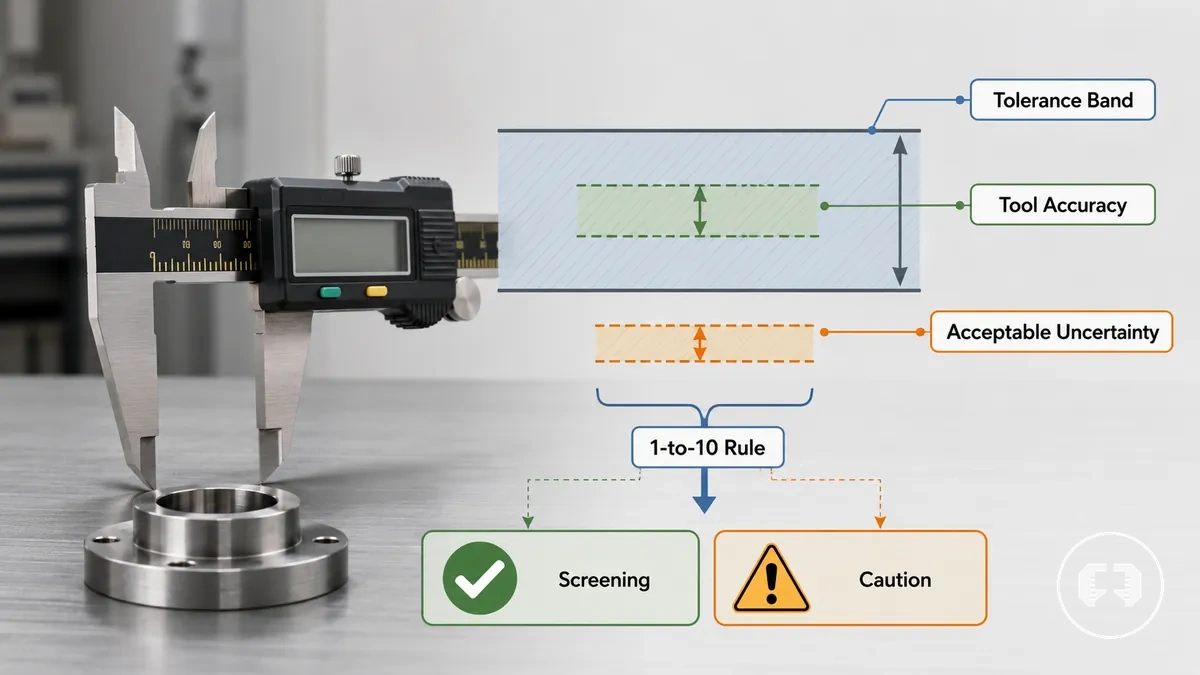
When inspection involves a narrow tolerance margin, the 1-to-10 rule can help compare tool accuracy with acceptable uncertainty before relying on the measurement. The result should still be qualified by the inspection context, material, measurement method, and any applicable requirements because these factors can change what is considered suitable. For example, if the available accuracy margin occupies only a small portion of the allowed tolerance, the rule may indicate that additional verification is appropriate before the measurement is used for decision-making.
Tool mix for a complete precision measuring set
Tool mix for a complete precision measuring set depends on selecting tool categories that match the required measurement tasks rather than collecting the largest number of tools. A measuring set should cover the intended measurement role, access requirements, and tolerance needs. Completeness is defined by job coverage, not tool count.
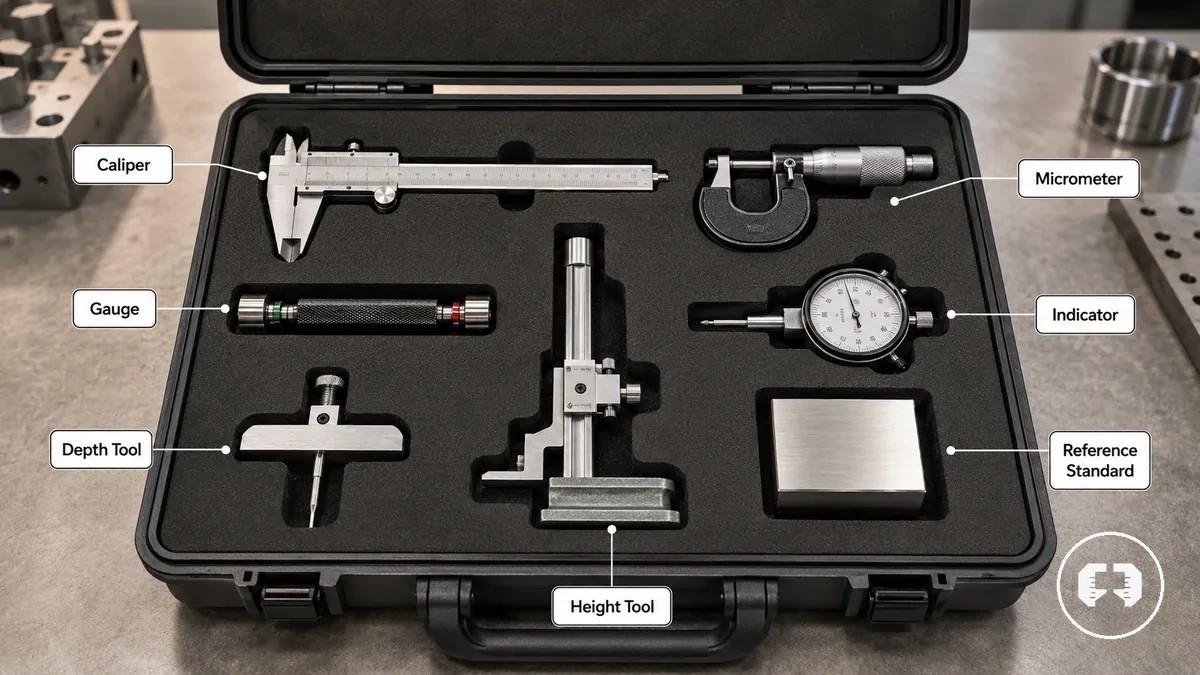
When routine work includes outside, inside, depth, and verification measurements, different tool categories may be needed to prevent coverage gaps. A caliper often supports general dimensional checks, while a micrometer may be appropriate when tighter tolerance requirements apply. Gauges, indicators, depth tools, height tools, and a reference standard belong in the kit only when their measurement role matches the inspection task. The checklist below verifies whether the primary tool categories provide complete measurement coverage.
- Caliper — General dimensional measurement; essential for broad measurement coverage.
- Micrometer — Higher-precision external measurement; essential when tighter tolerance requirements apply.
- Gauge — Verifies specific dimensions or conditions; include when the inspection task requires it.
- Indicator — Detects movement or variation; include for alignment, runout, or repeat measurements.
- Depth tool — Measures recesses and hole depth; include when depth measurements are required.
- Height tool — Measures or marks vertical dimensions; conditional on layout or height inspection tasks.
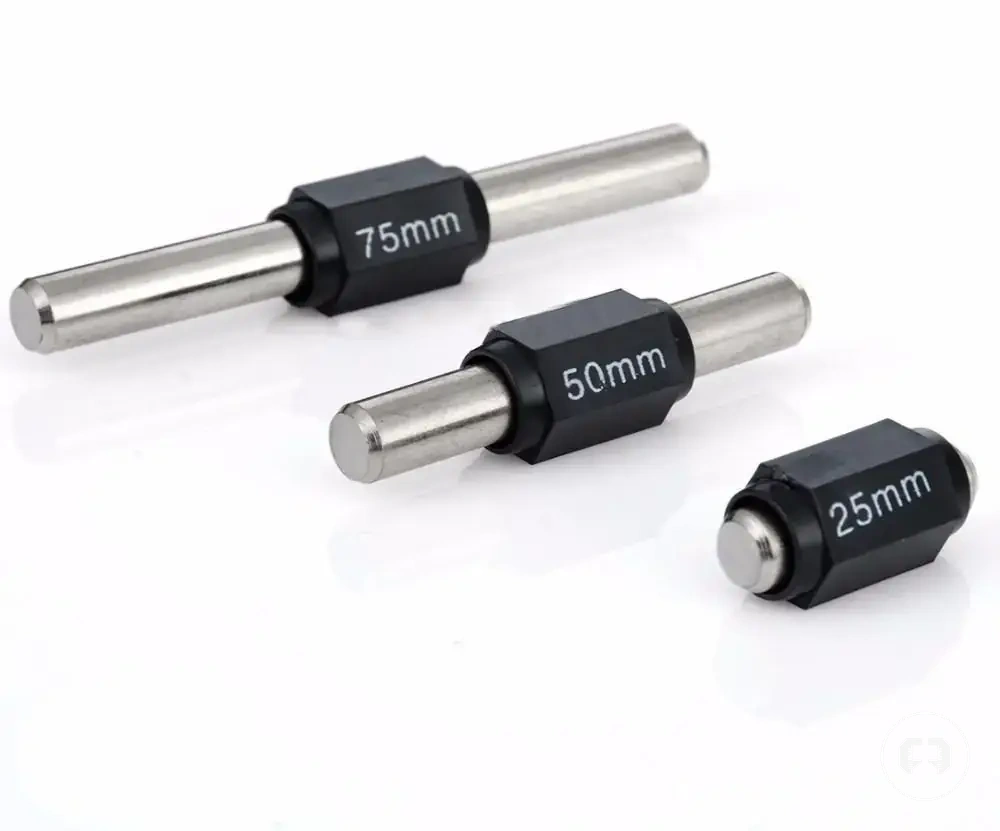
- Reference standard — Supports measurement verification; include when verification is part of the workflow.
A complete precision measuring set separates essential tools from conditional and specialist tools according to measurement role instead of assuming every category belongs in every kit. More tools do not automatically improve kit coverage because inclusion depends on the work type and tolerance needs. For a broader category overview without comparing individual products, see precision measuring tools comparison.
Caliper and micrometer coverage
Caliper and micrometer coverage depends on the measurement task because each tool supports different measurement needs within the same kit. A caliper covers outside measurement, inside measurement, depth, and many diameter checks across a broader range, while a micrometer is typically chosen for thickness or diameter measurements where resolution, contact surface, and repeatability become more important. This distinction separates broad caliper coverage from tighter micrometer checks.
When a measuring kit must handle both general inspection and closer tolerance work, a compact comparison helps define which tool belongs in each situation.
| Tool | Best coverage | Limitation | Kit decision |
|---|---|---|---|
| Caliper | Outside measurement, inside measurement, depth, diameter, and broad measuring range | May be less suitable when higher resolution and repeatability are required | Essential for broad measurement coverage |
| Micrometer | Thickness and diameter measurements with controlled contact surface and higher repeatability | Usually covers a narrower range and fewer measurement types | Include when tighter tolerance requirements justify it |
For example, a kit inspecting a machined component may use a caliper for general outside measurement, inside measurement, and depth checks before using a micrometer to verify final thickness or diameter where greater resolution is needed. Both tools complement each other because the appropriate choice depends on part shape, tolerance, measurement access, and the required repeatability.
Gauge, indicator, depth, and height measurement needs
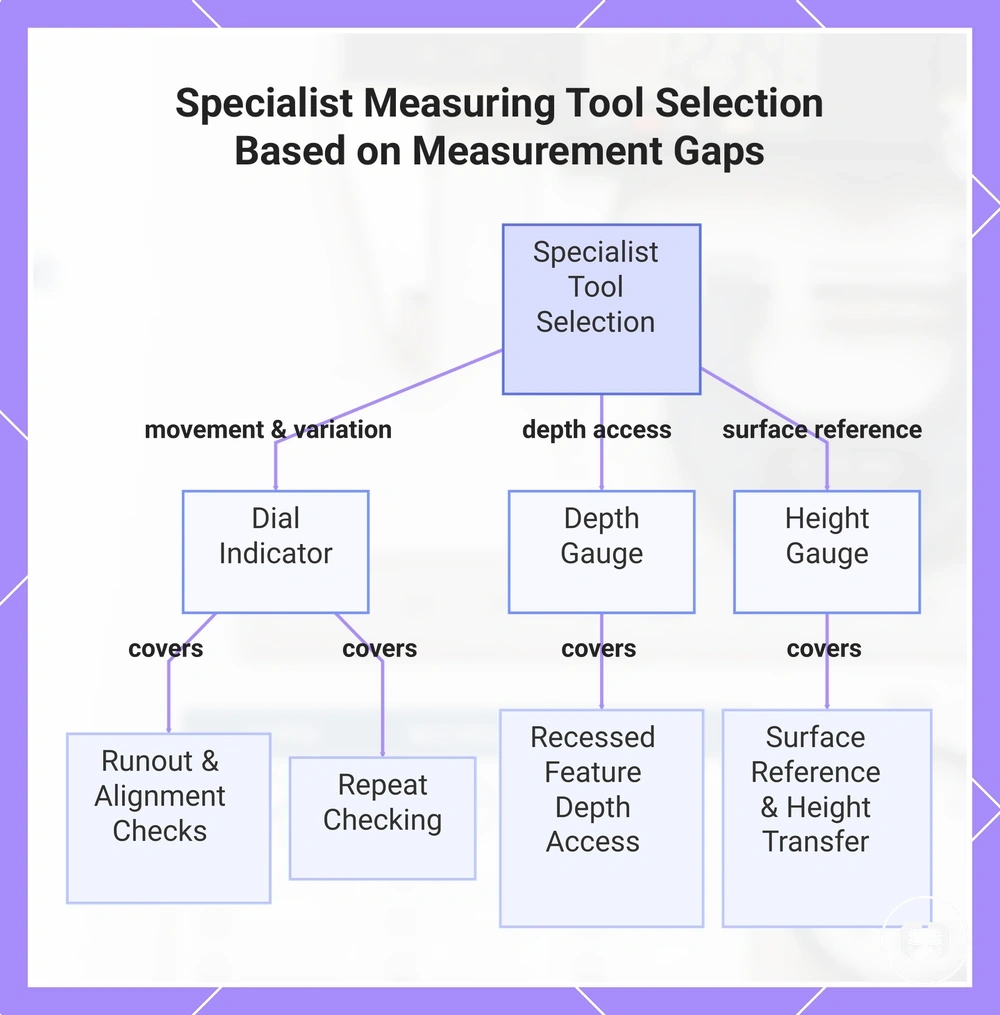
Gauge, indicator, depth gauge, and height gauge selection depends on whether basic measuring tools leave a measurement gap. These specialist tools extend kit coverage for tasks involving runout, alignment, surface reference, depth access, and repeat checking when those measurement needs are part of the work. Specialist tools are conditional rather than essential for every kit.
When inspection work requires measurements beyond basic caliper and micrometer coverage, the following criteria help determine which specialist tool belongs in the kit.
- Gauge — Closes a verification gap when a specific measurement or reference check is required.
- Dial indicator — Supports runout, alignment, and repeat checking when movement or variation must be evaluated.
- Depth gauge — Closes the gap where recessed features or limited depth access require dedicated measurement.
- Height gauge — Supports measurements from a surface reference and height transfer when vertical dimensions must be compared or marked.
- Specialist tool — Belongs when the work type creates a measurement gap that basic tools do not adequately cover, rather than as a standard addition to every kit.
Each specialist tool should be selected only when its measurement role matches the inspection requirement. Runout, alignment, surface reference, depth access, and repeat checking each represent a different measurement gap that may justify adding a gauge, indicator, depth gauge, or height gauge to the kit.
This chart shows the three specialist tools most commonly added to a measuring kit when basic tools leave a measurement gap, and the specific types of inspection each tool supports.
Kit level for beginner, workshop, and professional use
Kit level depends on user context, measurement risk, and the work the kit is expected to support. As measurement requirements become more demanding, kit complexity, durability, and verification needs may also change. The appropriate kit level is the fit between user context and acceptable measurement risk.
The comparison below shows how kit level changes selection priorities according to typical use rather than prescribing one solution for every buyer.
| Kit level | Typical coverage | Risk to manage | Upgrade signal |
|---|---|---|---|
| Beginner kit | Basic measurement tasks with a modest tool count and ease of reading | Adding unnecessary complexity for straightforward work | Measurement needs expand beyond basic tolerance or tool coverage |
| Workshop kit | Broader measurement coverage for repeat use and regular inspection | Limited durability or insufficient coverage for frequent work | More demanding measurement or verification requirements |
| Professional set | Broader coverage for more demanding inspection responsibilities | Choosing unnecessary complexity when work does not require it | Higher calibration expectations or broader measurement responsibilities |
When measurements are occasional and tolerance requirements remain relatively straightforward, a beginner kit may provide suitable coverage with a manageable tool count. A simple tool mix and ease of reading can reduce selection risk while preserving an upgrade path if future measurement needs increase.
When measurements become part of regular workshop activity, a workshop kit may be more suitable because repeat use often increases the value of broader coverage and durable storage. Durability becomes a more important selection criterion as measurement frequency increases.
When inspection work requires broader coverage or higher verification demands, a professional set may be appropriate if calibration expectations also increase. Buyers deciding between a reliable starter kit and a broader professional measuring set should match the choice to their work, tolerance requirements, and upgrade path. If the beginner path needs more detail, see first-time buyer guidance.
Build quality, readability, and handling reliability
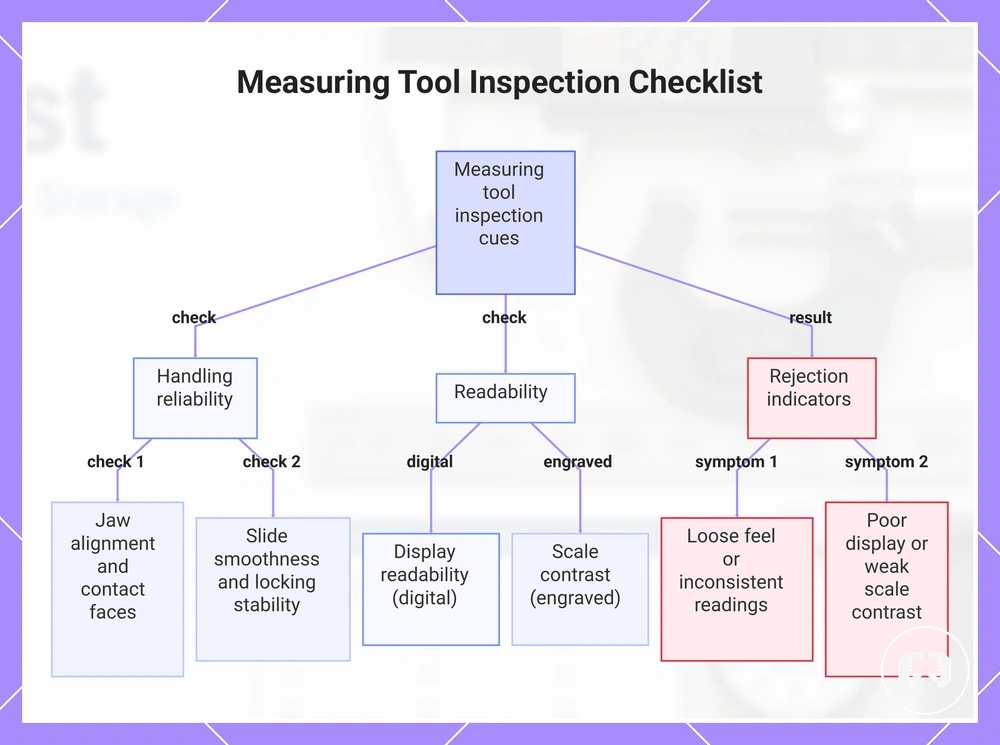
Build quality, readability, and handling reliability influence whether a measuring tool can provide stable, usable readings during normal work. Observable physical cues help identify handling issues before purchase because loose components, unclear displays, or inconsistent movement can increase measurement risk. A tool that feels stable and operates consistently is more likely to support stable readings under normal handling.
The checklist below highlights practical inspection cues that can influence measurement confidence and purchase decisions.
- Jaw alignment — Misaligned contact faces may increase the risk of inconsistent measurements.
- Slide smoothness — Rough or uneven movement can affect handling reliability and repeatability.
- Locking stability — A lock that shifts after positioning may reduce reading consistency.
- Display readability — A clear display can reduce reading errors in normal working conditions.
- Scale contrast — Weak contrast may make engraved or printed graduations harder to read.
- Battery dependence — Digital tools may require battery management to maintain display availability.
- Repeatability — Consistent repeated readings can help verify stable tool behaviour during normal handling.
When inspecting a tool before purchase, check jaw alignment, contact faces, slide smoothness, and locking stability because these physical attributes influence handling reliability. Reading clarity also depends on display readability for digital tools and scale contrast for engraved scales. Together, these checks help identify alignment, movement, and readability issues before selection.
Appearance alone does not confirm build quality or handling reliability. A tool that feels loose, produces inconsistent repeated readings, has poor display readability, shows weak scale contrast, or appears poorly finished may warrant rejection in favour of a better-built alternative based on observable inspection cues.
This chart shows the key observable cues to inspect before purchasing a measuring tool, including handling reliability, readability, and conditions that may warrant rejection.
Material, finish, and durability checks
Material, finish, and durability checks help determine whether a measuring tool is likely to remain dependable during normal use. Buyers should inspect the tool body, contact faces, and visible finish instead of assuming that one material guarantees accuracy in every situation. Material condition and finish affect day-to-day reliability when they match the intended use and remain free from obvious defects.
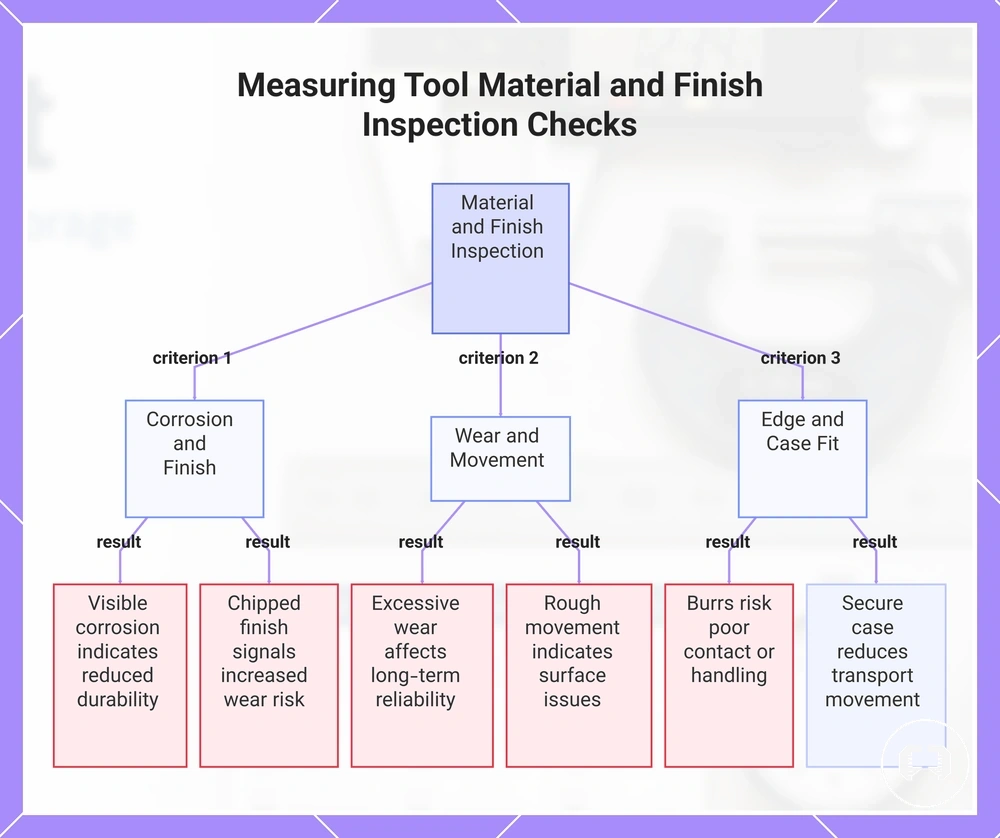
When inspecting a tool before purchase, focus on these material and finish cues:
- Stainless steel — Corrosion resistance should be checked because visible corrosion or staining may indicate reduced durability.
- Hardened surface — Contact faces should show even wear because excessive wear can affect long-term reliability.
- Protective finish — An intact finish helps protect the tool body, while chipped or damaged areas may signal increased wear risk.
- Smooth movement — Sliding parts should move consistently because rough movement may indicate surface or finish issues.
- Burr-free edge — Clean edges reduce the risk of poor contact or handling problems during purchase inspection.
- Case fit — A secure case fit helps reduce unnecessary movement during transport and handling.
If visible corrosion, damaged finish, rough movement, worn contact faces, or burrs are present, those conditions may justify rejecting the tool in favour of one in better physical condition. When the material, corrosion resistance, protective finish, and surface condition appear suitable for the intended use, the tool may be an appropriate purchase choice, depending on expected durability requirements and working conditions.
This chart shows the six key material and finish cues to inspect on a measuring tool before purchase, along with the implication of each defect or condition.
Display type, scale clarity, and stable readings
Display type, scale clarity, and stable readings determine how confidently a measurement can be read during normal use. A clear digital display, readable analog scale, dial face, or vernier markings can reduce selection mistakes by improving reading clarity, but display type alone does not prove tool accuracy. Good readability supports stable readings when lock function, zeroing behavior, and reading repeatability remain consistent.
When comparing measuring tools before purchase, focus on what display or scale clarity changes for reading confidence rather than assuming one display type is superior.
| Display or scale feature | What it changes for the buyer |
|---|---|
| Digital display | Supports quick reading and display readability but does not prove accuracy by itself. |
| Analog scale, dial face, and vernier markings | Depend on scale clarity and contrast to support confident reading. |
| Lock function, zeroing behavior, and reading repeatability | Support stable readings by helping repeated measurements remain consistent. |
If scale contrast is weak or vernier markings are difficult to distinguish, reading confidence may decrease even when the tool appears well finished. For example, a faint analog scale can make repeated readings harder to confirm, increasing purchase-decision risk because scale clarity—not display type alone—affects reading confidence.
Case, storage, and accessory requirements
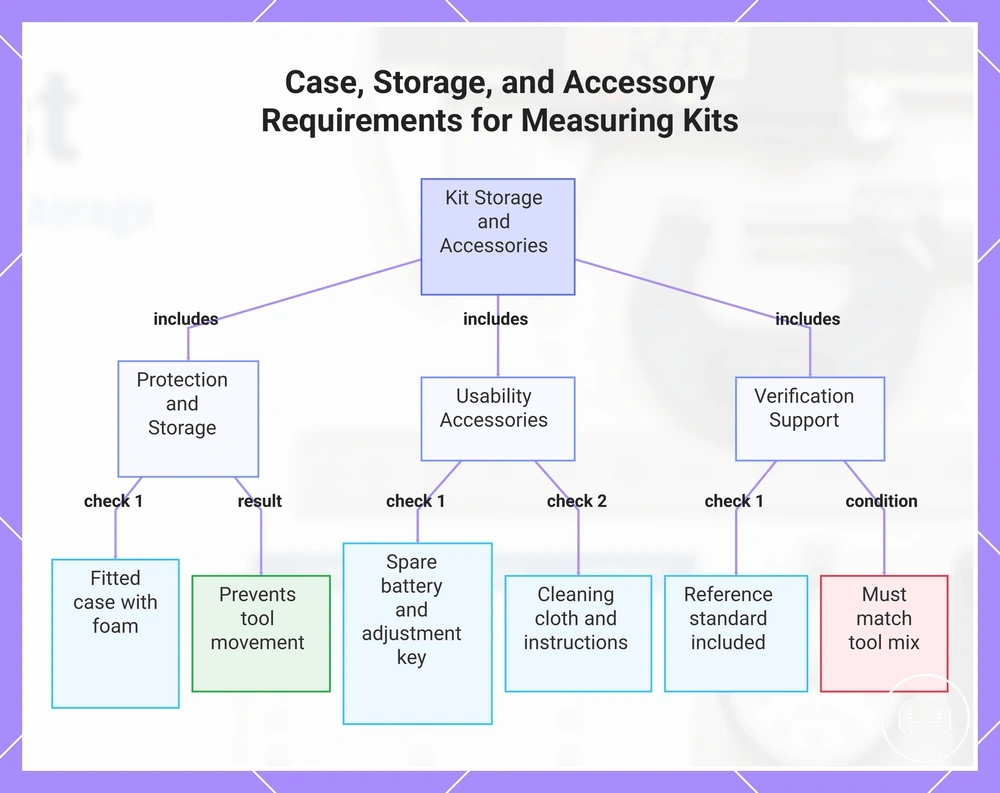
Case, storage, and accessory requirements help verify whether a measuring kit includes the items needed to protect measuring tools and support usability after purchase. A fitted case, appropriate storage, and relevant accessories improve purchase readiness only when they match the selected tool mix rather than simply increasing the number of included items.
Use the checklist below to confirm whether the included storage and accessories support the intended measurement tasks.
- Fitted case — Protects tools from unnecessary movement and matters when the kit will be transported or stored regularly.
- Foam or molded protection — Supports tool alignment by securing each item in place and matters when multiple precision tools are stored together.
- Spare battery — Supports usability for tools with a digital display and matters only when battery-powered operation is required.
- Adjustment key — Supports tool adjustment when the selected measuring tool requires it.
- Cleaning cloth — Supports clear measuring surfaces and is relevant when included with the selected tool mix.
- Reference standard — Supports verification and matters when measurement consistency is part of the intended workflow.
- Instructions — Support correct use and matter when the kit includes features or functions that require guidance.
If a kit omits storage or accessories that are relevant to the selected tool mix, additional items may be needed before the kit is fully ready for use. Conversely, accessories that do not match the included measuring tools add little selection value, even when the accessory set appears extensive. Purchase readiness depends on whether the case, storage, and accessories protect the tools and support the intended measurement tasks.
The products below are useful examples for comparing available options. Before buying, check that the compatibility criteria, key features, and product details match your needs.
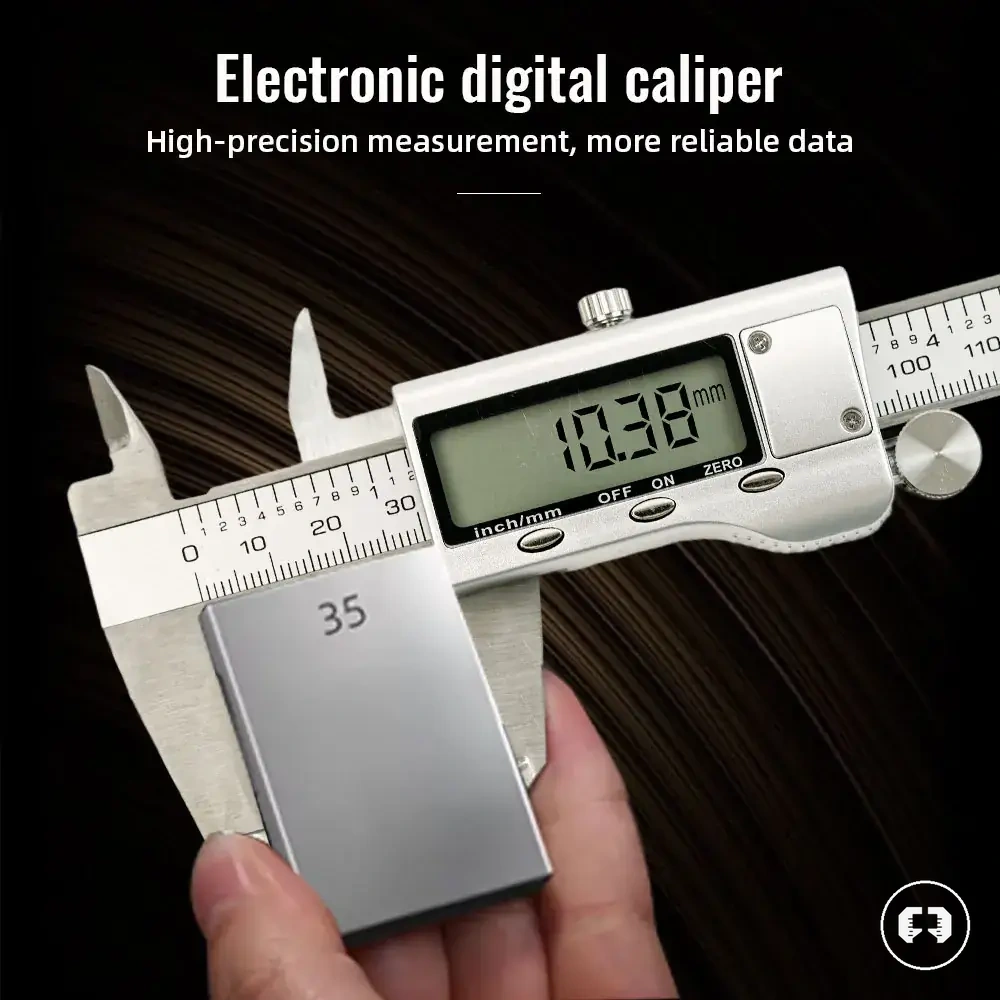
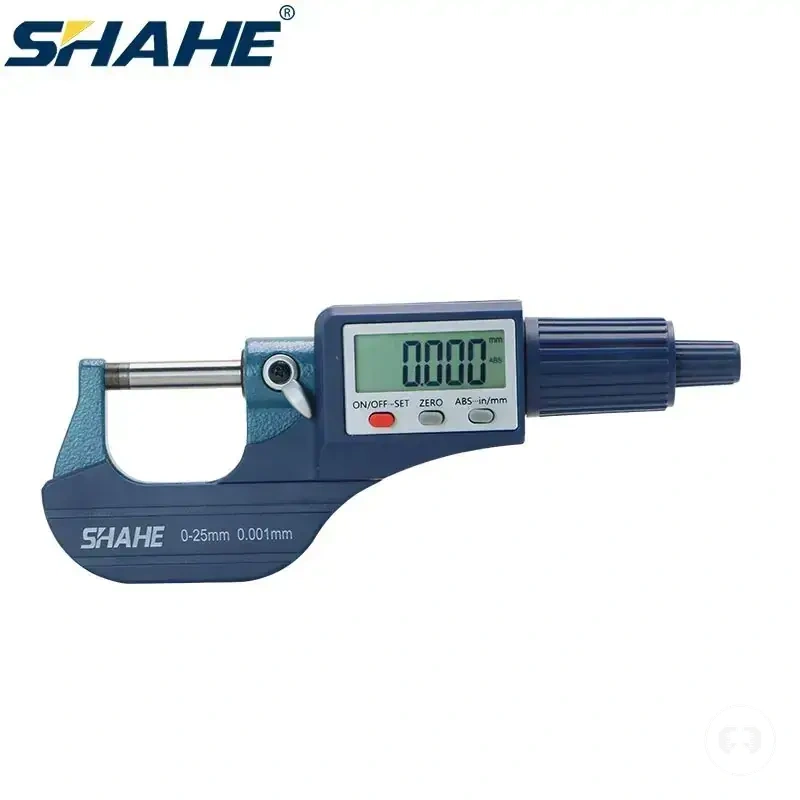
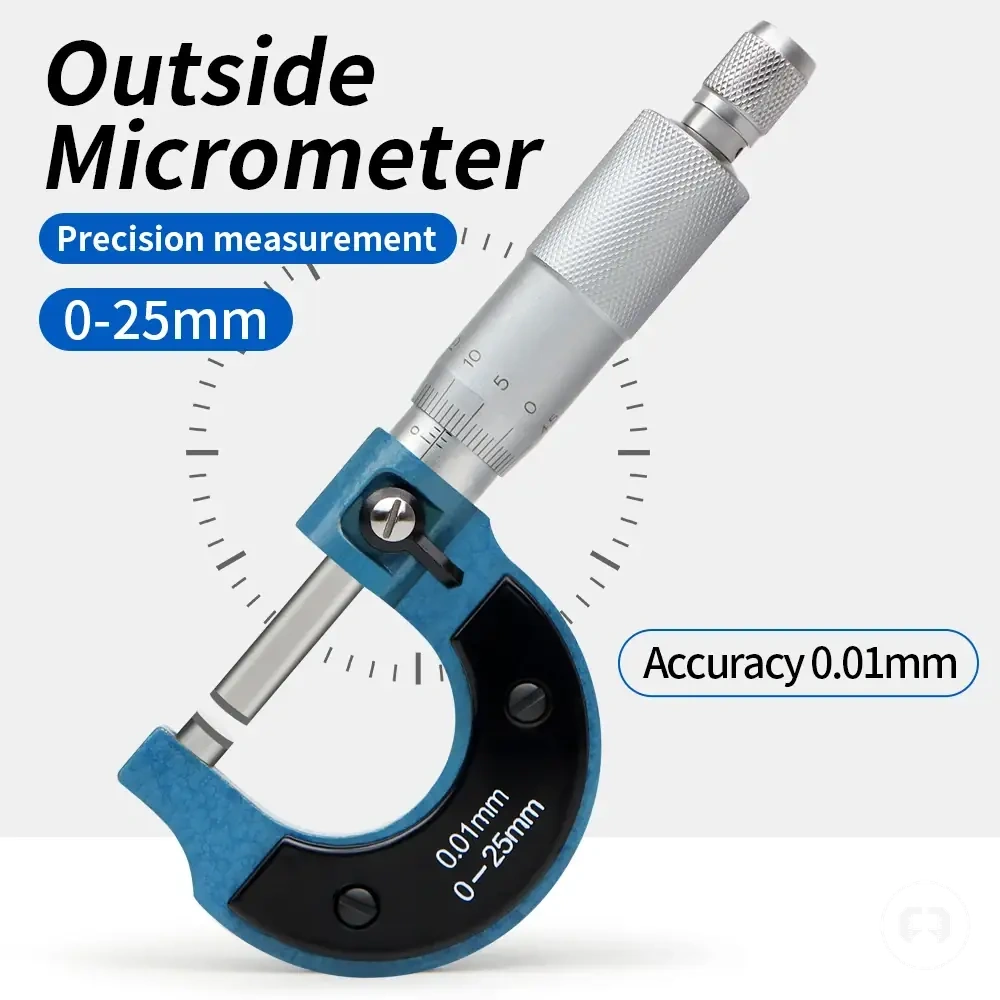
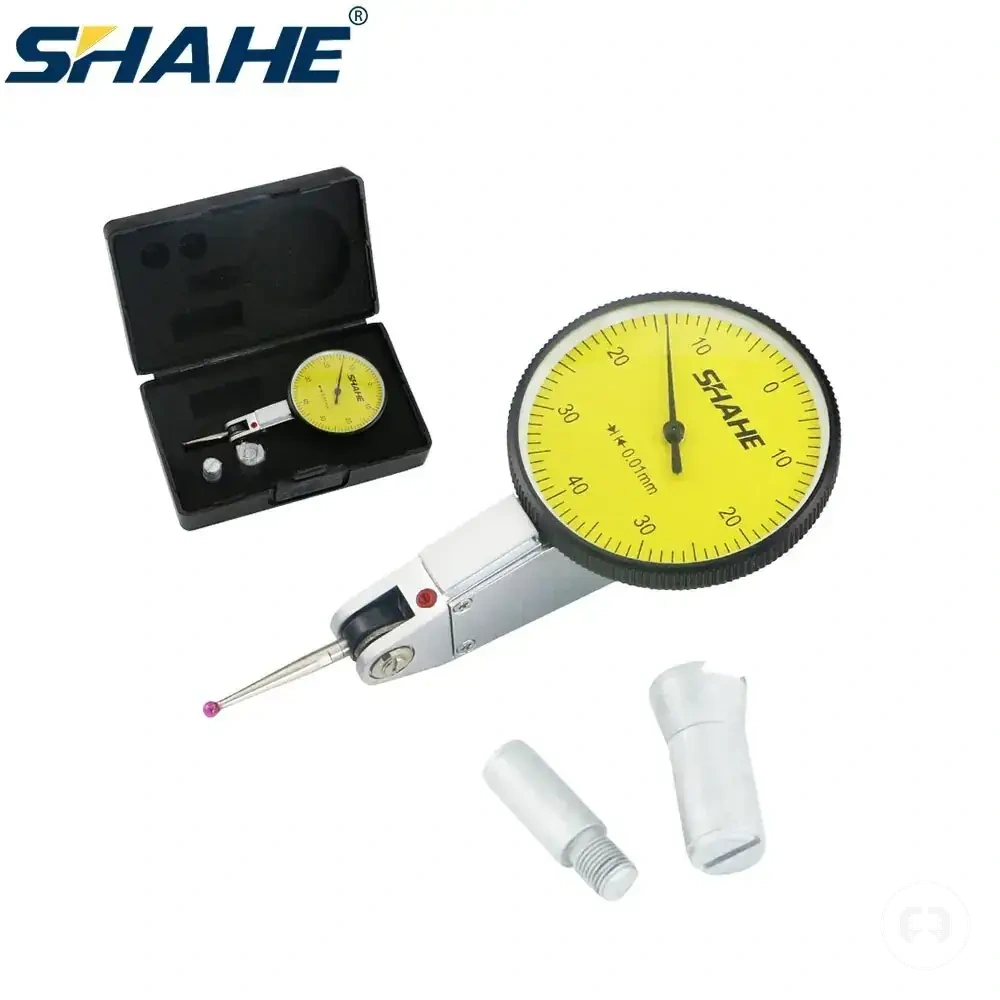
This chart shows how to evaluate whether a measuring kit's case, storage, and accessories support purchase readiness and intended measurement tasks.
Purchase-readiness checks before comparing prices
Purchase-readiness checks before comparing prices confirm whether a measuring kit has passed the core selection checks before offers are compared. Price comparison should happen only after the kit matches the work, the accuracy burden, and the required contents. Purchase-readiness means passing the core selection checks.
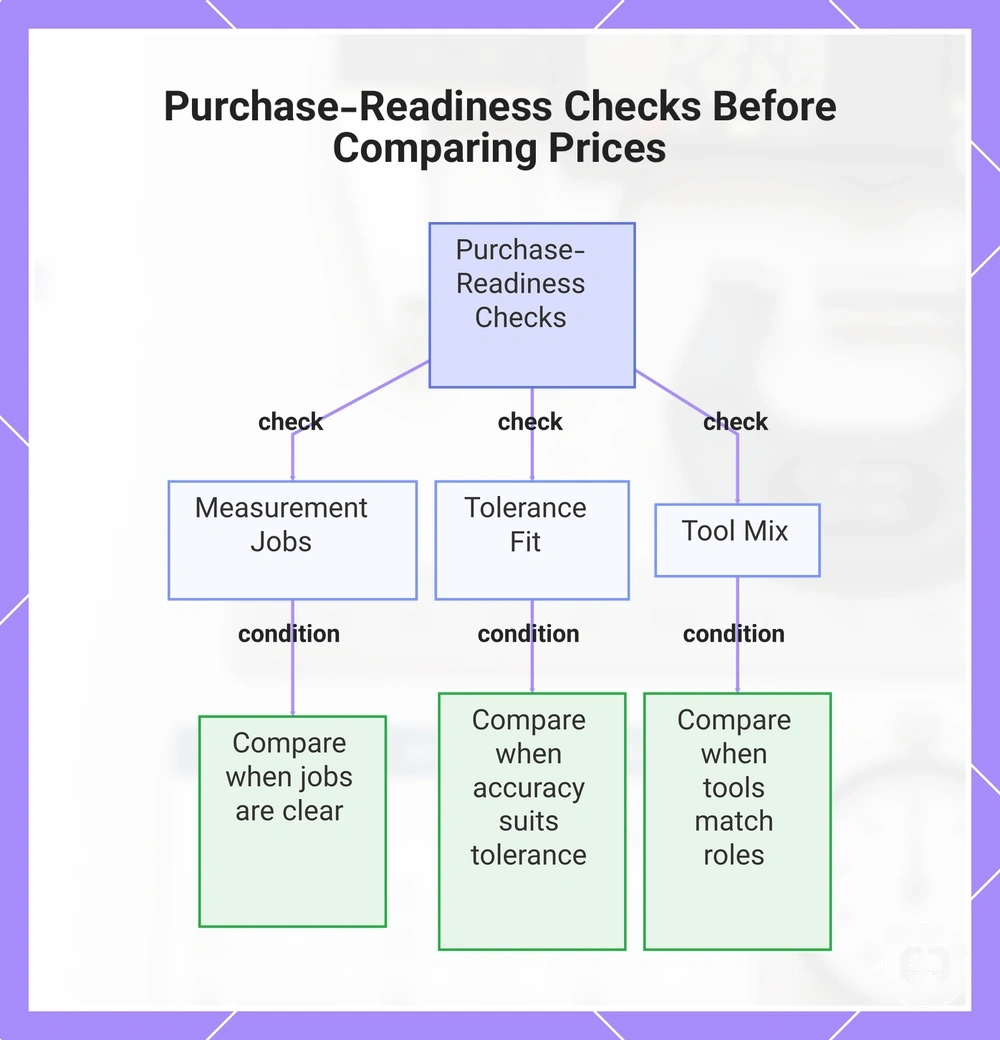
Comparing unsuitable offers can make a low price look attractive even when the kit does not match the required measurement jobs. The safer approach is to verify each offer element against a clear verification criterion before deciding to compare, delay, or reject it. A kit is ready to compare only when confirmed measurement jobs, tolerance fit, and tool mix are clear.
When two offers look similar, purchase-readiness checks before comparing prices help prevent comparing kits that solve different problems. Use the checklist below to verify whether each offer has an acceptable condition for the intended work.
- Confirmed measurement jobs — Compare when the kit covers the required checks; delay when the jobs are unclear; reject when key measurement roles are missing.
- Tolerance fit — Compare when tool accuracy suits the tolerance condition; delay when acceptable uncertainty is unclear; reject when the tool appears too coarse for the work.
- Tool mix — Compare when the included tools match the required measurement roles; delay when category coverage is incomplete; reject when essential tool types are absent.
- Handling reliability — Compare when movement, locking, and repeat readings appear stable; delay when handling cannot be checked; reject when readings seem inconsistent.
- Storage completeness — Compare when the case and storage support the selected tool mix; delay when protection details are unclear; reject when storage leaves important tools unsupported.
- Calibration status — Compare when stated calibration or verification context matches the intended use; delay when status is unspecified but relevant; reject unsupported certainty claims.
- Return assumptions — Compare when the offer terms can be reviewed through the merchant; delay when assumptions are unclear; reject claims that cannot be verified before purchase.
- Offer value — Compare when the price reflects usable coverage; delay when value boundaries are unclear; reject when price is the only reason the kit seems suitable.
A lower price does not automatically mean lower accuracy, and a higher price does not automatically make a kit suitable. Offer value depends on fit, usable coverage, stated conditions, and the measurement risk already identified in the accuracy and cost-value tradeoffs. Price comparison should begin only after the kit passes the readiness checks.
The products below are useful examples for comparing available options. Before buying, check that the compatibility criteria, key features, and product details match your needs.
This chart shows the three core selection checks that a measuring kit must pass before its price can be compared with other offers.
Condition, calibration status, and included standards
Condition, calibration status, and included standards should be verified before treating a measuring kit as purchase-ready for price comparison. Visible condition and zero behavior can help identify whether additional verification is appropriate, while calibration expectations depend on the intended use case, inspection standard, and tool type.
Use the checklist below to separate stated claims from evidence that can be verified before comparing offers.
- Condition — Verify visible condition for wear or damage; compare only when physical condition supports the intended use.
- Zero behavior — Verify that the tool returns to an appropriate zero position when applicable; investigate further if zero behavior appears inconsistent.
- Calibration status — Check whether a certificate or stated calibration status is provided when it is relevant to the intended use; formal calibration is not necessarily required for every kit.
- Included standards — Verify whether a reference standard or gauge block is included when reference checks are part of the intended workflow.
- Stated claim — Treat seller statements as supporting information only when the claim is specific enough to verify through accompanying calibration evidence or documentation.
Visible condition, zero behavior, and included standards can improve purchase confidence, but a stated calibration status alone is not enough. Purchase readiness is stronger when calibration evidence supports the stated claim and the buyer can verify that evidence directly.
Offer value without SKU or brand dependency
Offer value should be judged by measurable purchase criteria rather than by SKU or brand dependency alone. Included tool roles, accuracy claims, accessory completeness, storage protection, support information, and partner-return clarity provide a stronger basis for deciding whether the price reflects usable coverage. Offer value is defined by these criteria rather than by catalogue identity.
The points below separate offer value from product identity when comparing measuring kits.
- Included tool roles — Prove whether the kit covers the intended measurement tasks; a familiar SKU or brand name alone does not prove suitable coverage.
- Accuracy claims — Support offer value only when the claims are specific enough to assess; general claims alone do not prove measurement capability.
- Accessory completeness and storage protection — Support purchase readiness when the included items protect the tools and match the intended measurement tasks.
- Support information and partner-return clarity — Qualify offer value by explaining available documentation and post-purchase arrangements, but they do not prove measurement quality on their own.
- Price and usable coverage — Reflect stronger offer value when the included contents match the intended work instead of relying on SKU or brand identity.
A larger kit is not automatically better value simply because it contains more items. In many cases, a smaller kit with appropriate included tool roles, credible accuracy claims, complete accessory completeness, and suitable storage protection can provide stronger offer value than a larger set with incomplete coverage or uncertain reliability.